OTP (One Time Password) Send it from any SMS Service, and how it is used.
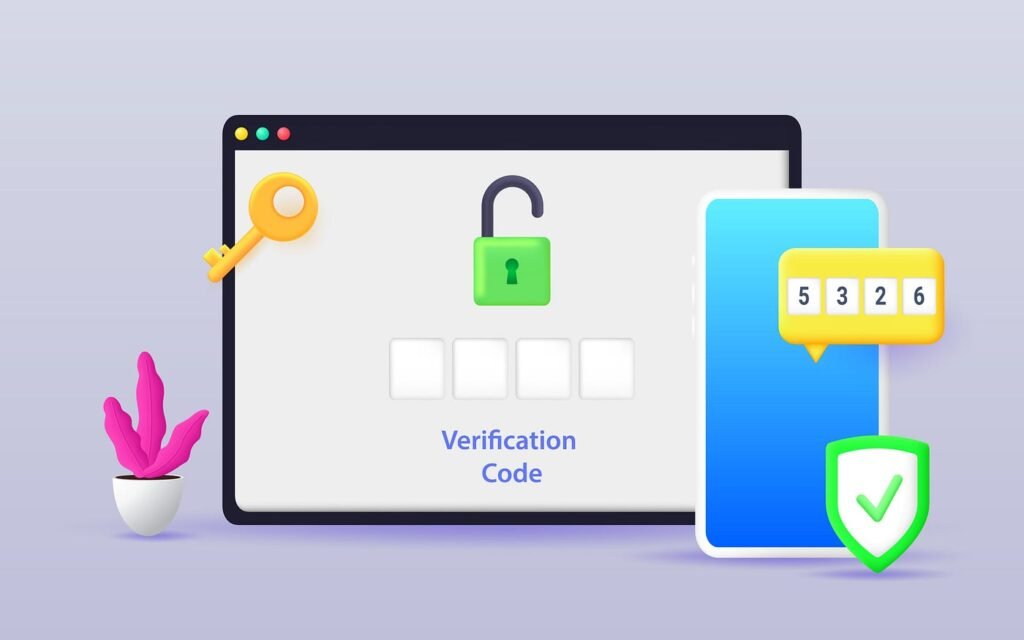
What is OTP?
A one-time password (OTP) is an automatically generated numeric or alphanumeric string of characters that authenticates a user for a single transaction or login session.
Why to use OTP?
An OTP is more secure than a static password, especially a user-created password, which can be weak or reused across multiple accounts.
OTPs may replace authentication login information or may be used in addition to it to add another layer of security.
[HttpPost]
public JsonResult SendOTP(string number)
{
    var status = "fail";
    if (number != "")
    {
        status = "Invalid";
        if (number.Length == 10)
        {
            string otpValue = new Random().Next(100000, 999999).ToString();
            try
            {
                ///   Sms Sending Code.
                var messageAPI = new MessageAPI();
                string smsBody = "Your OTP Number is " + otpValue
                + " ( Sent By : XT)";

                //SMS Service Logic//
                string smsResult = messageAPI.SendSmsViaNewAPI(smsBody,
                number);
                status = smsResult;
                Otp createOtp = new Otp()
                {
                    PhoneNo = number,
                    OtpValue = otpValue,
                    CreatedDate = DateTime.Now,
                    ExpiryDate = DateTime.Now.AddMinutes(10),
                    IsVerify = 0
                };
                otpManager.InsertOtp(createOtp);
                return Json(status, JsonRequestBehavior.AllowGet);
            }
            catch (Exception e)
            {
                throw (e);
            }
        }
    }
    return Json(status, JsonRequestBehavior.AllowGet);
}
Why I wrote this article?
To describe how the one-time password works in a simple way and How you can use it in your application.
For sending the OTP, We can create a post method, which will have the Phone Number as input and the OTP will be sending to that 10-digit mobile number in form of a text SMS.
This Above Code will send the OTP to Mobile Number.
Now How to Verify the OTP? Which the user will enter what has been received in the SMS.
For that We need a Verify or Validating OTP Method ,Which will check the Enter OTP is correct or not.
[HttpPost]
public JsonResult VerifyOTP(string otp)
{
    bool result = false;

    //Code to Verify the OTP
    var resultData = otpManager.VerifyOtp(otp);
    if (resultData != null && resultData.Tables[0] != null && resultData.Tables[0].Rows.Count > 0)
    {
        result = true;

        // Code to Update that the OTP which is entered is used.
        otpManager.UpdateVerifyOtp(otp);
    }
    return Json(result, JsonRequestBehavior.AllowGet);
}
In this article we are discussing What is Razorpay, how to setup razorpay account and implement in Asp.net Core
What we will learn
What is Razorpay Payment Gateway?
Creating Razorpay Payment Gateway Account Setup
Integrate Razorpay Payment Gateway in ASP.NET Core
What is Razorpay Payment Gateway?
A payment gateway is an online service that authorizes and processes payments for online businesses. It is the connection between the customer and the merchant. Razorpay’s platform is designed to facilitate smooth and secure transactions, with features like easy integration, robust security measures, detailed analytics, and customizable checkout options. Some popular payments Gateway are below
PayPal
Stripe
Authorize.net
Amazon Payments
2Checkout
Here, Razorpay Payment Gateway enables to accept payments via debit card, credit card, net banking, UPI, and popular supported wallets.
Creating Razorpay Payment Gateway Account Setup
Let’s sign up using this razor pay site https://razorpay.com/. you’ll need to some basic information about you business. we can sign up using a mobile number
After sign up it asks for the “business type” along with your name filling details and submit
Log into the Razorpay Dashboard After that move to the Settings then API key tab and generate a key for the selected mode
The razor pay payment gateway provides two modes Live and test mode. If we are beginner then start with test mode and test transactions without processing real payment. We can here use test cards, bank accounts and other payment methods which is provide by razorpay. Live mode If you are satisfied with your integration and testing in sandbox environment, you can switch test mode to live mode
Click on the Regenerate test key to open below pop up with razor pay key id and key secret and we can use this key id and key secret in our application. Remember this key id and the key secret is only for testing purposes and not will be used in the live application.
Integrate Razorpay Payment Gateway in ASP.NET Core
1.1 First Create ASP.NET Core MVC Project After that we need to Install the Razorpay package in NuGet using following command
1.2 After installation we can use the Razorpay attribute in the asp.net core. So first I have created a payment button so that clicking on this button shows payment windows. Here we have used the below source code in payment.aspx.cs file to open payment windows.
# HTML Code
<div>
    <link rel ="stylesheet" href="https://maxcdn.bootstrapcdn.com/bootstrap/4.5.2/css/bootstrap.min.css">
    <button type ="button" runat="server" class="btn btn-primary" onServerClick="btnProceedToPay_Click" >
        Proceed To Pay
    </button>
</div>
1.3 Clicking on the button that calls btnProceedToPay_Click method. In this method first, create an order, and after that call the openPaymentwindow function in jquery. So in jquery, we can handle payment status.
We can customize the below Details in the Payment windows.
Title: Name of company, it will be shown on UI modal
Description: Just a simple description of the purchase, it will also be shown in the modal.
Currency: Currency string of three characters
ImageLogo:Link of Logo, must be min dimension 256×256 & max size 1MB, of Company to be shown on modal, in our example case we are using a google logo.
ProfileMobile: prefilled mobile number
ProfileEmail: prefilled email
In the below code, we have used razorpay_key and razorpay_secret. Which is getting in the web config file. Whenever went with payment first order is created and after that payment is completed using orderID.
1.4 So now here we have calling jquery function to handle payment status. If any issues arrived during the payment transaction then we can handle using payment.failed method.
# jQuery – Send Pay Request
<script src="https://checkout.razorpay.com/v1/checkout.js"></script>
<script type="text/javascript">
function OpenPaymentWindow(key, amountInSubunits, currency, name, descritpion, imageLogo, orderId, profileName, profileEmail, profileMobile, notes)
{
    notes = $.parseJSON(notes);
    var options = {
        "key": key, // Enter the Key ID generated from the Dashboard
        "amount": amountInSubunits, // Amount is in currency subunits. Default
        "currency": currency, //currency is INR. Hence, 50000 refers to 50000 paise
        "name": name,
        "description": descritpion,
        "image": imageLogo,
        "order_id": orderId, //This is a sample Order ID. Pass the `id` obtained
                                      // in the response of Step 1
        "handler": function (response) {
        $.ajax({
            type: "POST",
            url: "frmExpiredVehicle.aspx/CreateOnlinePayment",

            // stored in  database using this method
            data: "{ TotalAmount:" + TotalAmount + ",'}",
            contentType: "application/json; charset=utf-8",
            dataType: "json",
            success: function (response) {
                var pID = response.d;   //successfully transaction
            },
            error: function (err) {
                alert(err);
            }
        });
    },
    "prefill": {
        "name": profileName,
        "email": profileEmail,
        "contact": profileMobile
    },
    "notes": notes,
    "theme": {
        "color": "#F37254"
    }
};
var rzp1 = new Razorpay(options);
    rzp1.open();
    rzp1.on('payment.failed', function (response) {
        alert("Oops, something went wrong and payment failed. Please try again later");
    });
}
</script>
Explanation of the above output:
The user clicks on the button associated with the payment.
A Modal open, which is provided by Razorpay opens in the middle of the window, Here the company name, the description, and the logo we have set before sending the request have been rendered here, also the contact number and email are prefilled.
Even if we have prefilled some details Like mobileno and email also then we have access to change them during the proceeding to payment.
After then, we can proceed to payment, let’s say we have chosen the card method, Here we have entered a test card detail “Card Number 4111 1111 1111 1111” expiry date can be any future month/year, CVV can be any three-digit number, also the name of the cardholder is prefilled here, but you can edit it before proceeding After that asking pin number you can enter any four digits and proceed.
Then Immediately, Razorpay will process the payment.
After completion once again Razorpay asks for your permission whether to do payment or not, click on success for proceeding with payment or click on failure to deny.
If payment is successfully done then we have received the below alert messages.
If payment failed then we received this message. It is always not possible to payment is successfully done. Sometimes we have facing issues like network issues, System down, incorrect OTP, and more.