Basic Information about 3JS
What is threejs?
three.js is the world’s most popular and powerful JavaScript library for displaying 3D content on the web. It provides developers with the tools and utilities necessary to build interactive and visually appealing 3D applications, games, visualizations, and more, all within the browser environment.
With Three.js, you can bring your ideas to life by leveraging the capabilities of WebGL, a web standard that enables hardware-accelerated 3D graphics in modern browsers. Three.js abstracts away the complexities of WebGL, providing a simplified and intuitive interface for working with 3D graphics.
Pre- requisite of threejs
- Proficiency in JavaScript
- HTML and CSS:
- Basic understanding of 3D graphics:
- WebGL
- Web Development Basics:
- Math Skills
Remember that learning Three.js is a journey, and you don’t need to master all these prerequisites before starting. As you work with Three.js and create projects, you’ll naturally build your knowledge and skills in these areas.
Installation / Setup of threejs
You can download threejs zip folder on the official Three.js website at https://threejs.org/
OR
You can install threejs by npm(node package manager) : npm i three
- Import threejs using this command

Core concepts of three.js
- Scene:
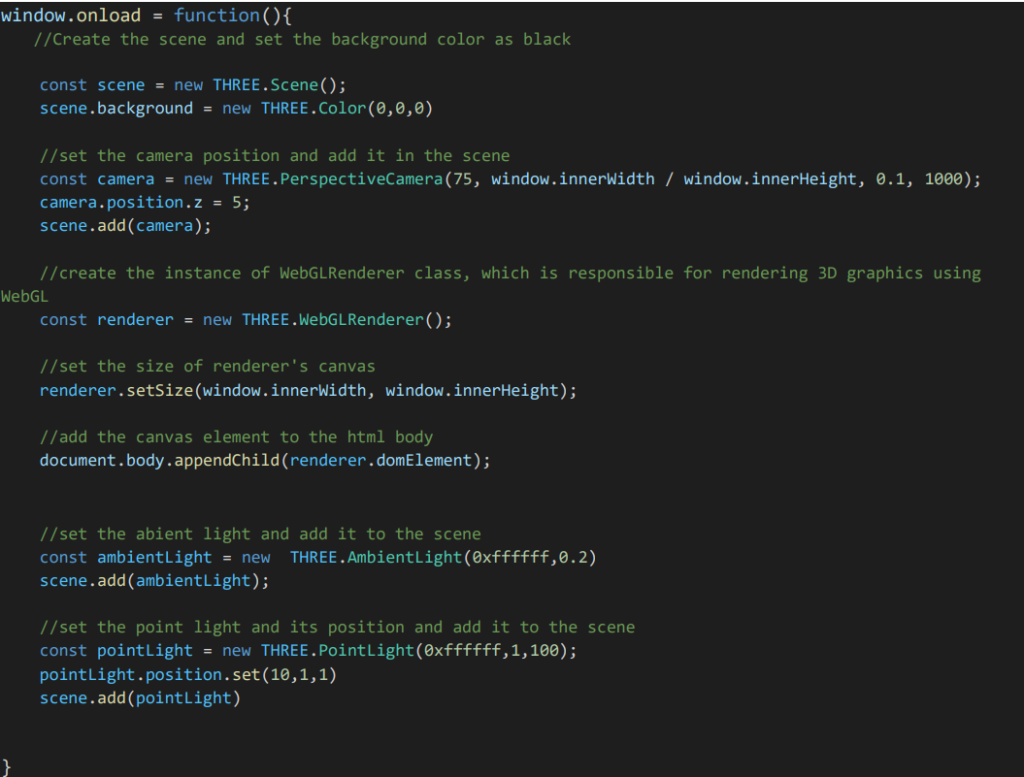
A Scene is the container that holds all the objects, lights, and cameras in Three.js. It represents the virtual 3D environment where your objects exist and interact. You can add and remove objects from the scene and control their transformations.

- Camera:
The Camera determines the viewpoint of the scene. It defines what portion of the scene will be visible in the rendered output. Three.js provides different camera types, including PerspectiveCamera, OrthographicCamera, and more. Cameras can be positioned and oriented to control the view of the scene.

- Renderer:
The Renderer is responsible for rendering the scene using WebGL or other rendering technologies. It takes the scene and camera as input and produces the final output onto a canvas or HTML element. Three.js provides WebGLRenderer as the default renderer, but you can also use other renderers like CSS3DRenderer or SVGRenderer.

- Geometry:
Geometry represents the shape and structure of 3D objects. Three.js provides a variety of pre-defined geometries, such as BoxGeometry, SphereGeometry, PlaneGeometry, and more. You can also create custom geometries by specifying vertices, faces, and other attributes.

- Material:
Materials determine how the surface of an object will appear when rendered. Three.js offers various types of materials, including MeshBasicMaterial, MeshPhongMaterial, MeshStanderdMaterial, and more. Materials can define properties like color, texture, shininess, transparency, and reflectivity.

- Mesh:
A Mesh is a combination of a Geometry and a Material. It represents a 3D object in the scene. You can create meshes by combining geometries and materials, and then add them to the scene.

- Lighting:
Lighting plays a crucial role in creating realistic 3D scenes. Three.js provides different types of lights, such as AmbientLight, DirectionalLight, PointLight, and SpotLight. You can position lights, adjust their intensity, color, and other properties to achieve desired lighting effects in your scene.

- Rendering Loop(Animation):
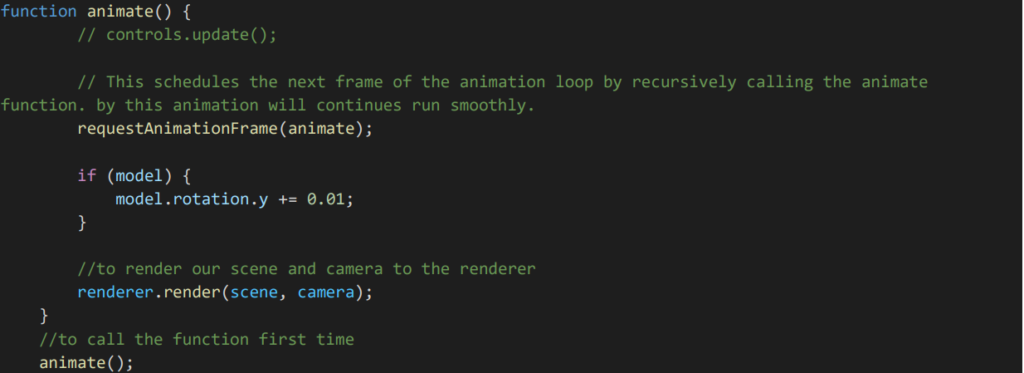
The Rendering Loop is a continuous process that updates and renders the scene on the screen. It typically involves updating object positions, animations, handling user interactions, and calling the renderer’s render() function to produce the updated view. The loop runs at a desired frame rate, usually 60 frames per second (FPS), to create smooth and interactive animations.

- Raycasting:
Raycasting is a technique used to determine which objects or parts of objects in the scene are intersected by a ray or a line segment. It is commonly used for picking or selecting objects, implementing collision detection, or handling user interactions like mouse clicks or touch events.
Example : https://threejs.org/docs/?q=ray#api/en/core/Raycaster
After creating the 3D Gemoetry using three.js, we can also apply texture and materials on the 3D object
- Textures:
Textures are images that can be applied to the surface of 3D objects in Three.js. They add visual details and realism to objects. Here’s an example of how to apply a texture to a simple cube:
Example:

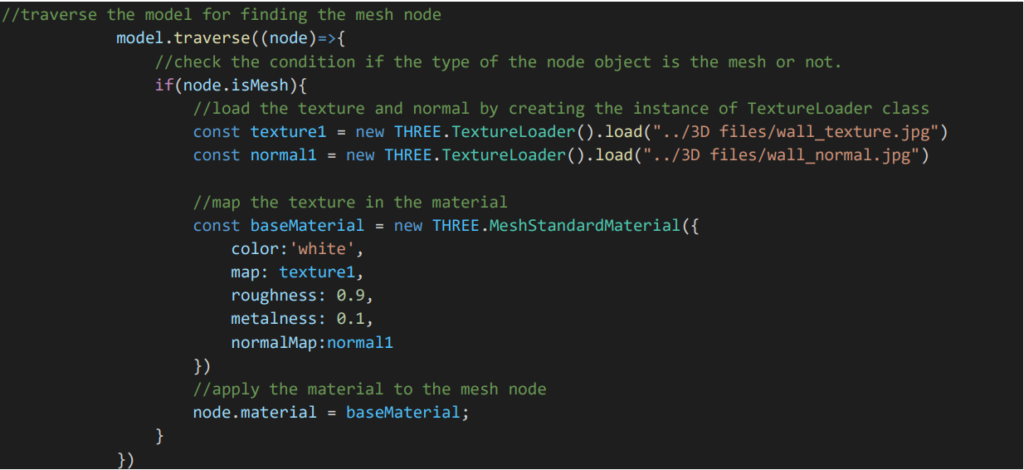
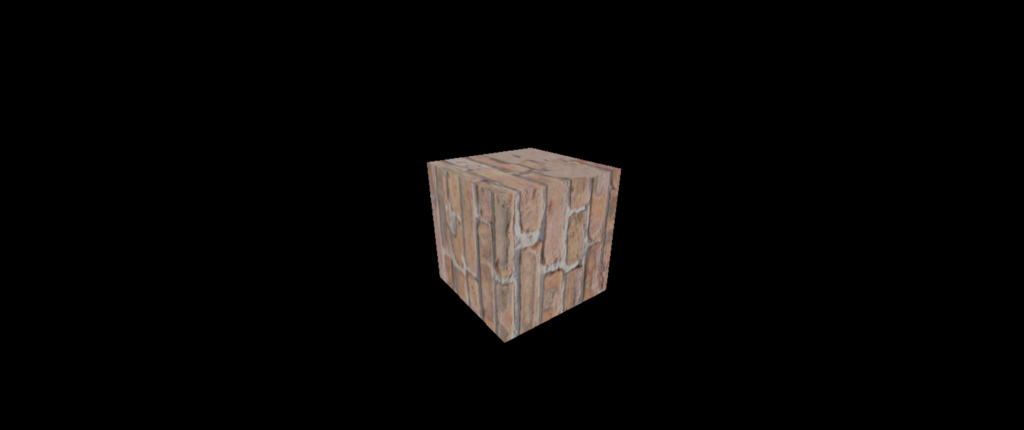
We also can use the normal maping to add surface details and depth to objects.by adding normal map, object will look more realistic.we also can add roughness and metalness on 3D object (value should be between 0 to 1). Here’s an example of applying normal mapping to a textured object:

Basic Information about 3JS Read More »
